
{
“@graph”: [
{
“@type”: “Article”,
“image”: {
“url”: “https://csuxjmfbwmkxiegfpljm.supabase.co/storage/v1/object/public/blog-images/organization-40763/1787884554734_Close-up-of-bubbles-in-epoxy-garage-floor-coating.jpeg”,
“@type”: “ImageObject”,
“caption”: “Close-up of bubbles in epoxy garage floor coating”
},
“author”: {
“url”: “https://precision-concretecoating.com”,
“name”: “Precision Concrete Coating in Conroe TX”,
“@type”: “Organization”
},
“headline”: “Homeowners & Pros: Stop Epoxy Floor Bubbling, Test with ASTM F1869 and F2170”,
“publisher”: {
“url”: “https://precision-concretecoating.com”,
“name”: “Precision Concrete Coating in Conroe TX”,
“@type”: “Organization”
},
“inLanguage”: “en-US”,
“description”: “How homeowners and contractors diagnose, prevent, and fix epoxy floor bubbling using ASTM F1869 and F2170 moisture tests, correct mixing, and proper…”,
“dateModified”: “2026-08-28T02:36:09.647Z”,
“datePublished”: “2026-08-28T02:36:09.647Z”
},
{
“@type”: “BreadcrumbList”,
“itemListElement”: [
{
“item”: “https://precision-concretecoating.com”,
“name”: “Precision Concrete Coating in Conroe TX”,
“@type”: “ListItem”,
“position”: 1
},
{
“item”: “https://precision-concretecoating.com/epoxy-floor-bubbling”,
“name”: “Homeowners & Pros: Stop Epoxy Floor Bubbling, Test with ASTM F1869 and F2170”,
“@type”: “ListItem”,
“position”: 2
}
]
}
],
“@context”: “https://schema.org”
}

{
“@type”: “FAQPage”,
“@context”: “https://schema.org”,
“mainEntity”: [
{
“name”: “Will Bubbles in Epoxy Go Away on Their Own?”,
“@type”: “Question”,
“acceptedAnswer”: {
“text”: “Small pinholes from minor outgassing sometimes stop appearing once the floor fully cures, but bubbles that are already formed in a hardened coating won’t flatten out or disappear on their own. Widespread bubbling or blisters typically need sanding and recoating, or moisture mitigation, to resolve permanently.”,
“@type”: “Answer”
}
},
{
“name”: “How Do You Get Air Bubbles Out of Epoxy Before It Dries?”,
“@type”: “Question”,
“acceptedAnswer”: {
“text”: “While the coating is still wet, backroll the surface with a spiked roller to pop bubbles as they form, and use a porcupine roller during primer application to release trapped air before it gets sealed in.”,
“@type”: “Answer”
}
},
{
“name”: “How Do You Avoid Bubbles When Applying Epoxy?”,
“@type”: “Question”,
“acceptedAnswer”: {
“text”: “Test the slab’s moisture with ASTM F1869 and F2170 before starting, mix material at low speed after conditioning it to room temperature, apply while slab temperature is stable or falling, and build the coating in thin layers rather than one thick pour.”,
“@type”: “Answer”
}
},
{
“name”: “How Do You Fix Air Bubbles in Epoxy That’s Already Dried?”,
“@type”: “Question”,
“acceptedAnswer”: {
“text”: “Sand the affected area, vacuum and solvent-wipe the surface, patch with a thixotropic filler, and recoat once it’s feathered smooth; widespread bubbling usually requires full mechanical sanding and a fresh prime coat rather than spot patching.”,
“@type”: “Answer”
}
}
]
}
Most bubbles in a new epoxy floor come from outgassing (moisture or air pushing up through the concrete) or entrained air trapped during mixing, and neither is rare. Stop parking or walking heavily on the floor, photograph every bump or crater, and note the recent weather, sun exposure, and mixing conditions. If the bubbling is scattered and small, it may just be cosmetic. If it’s widespread or shows up weeks after installation, get a moisture test before anyone recoats anything.
TL;DR:
- Most bubbles result from outgassing or entrained air during mixing, with outgassing pinholes forming during curing and moisture blisters appearing weeks later.
- Proper testing for moisture using ASTM F1869 and ASTM F2170 before application is crucial, and high moisture levels require targeted mitigation systems.
- Mixing at low speed, controlling environmental conditions, and applying in thin layers significantly reduce the risk of bubbling during installation.
- Repair strategies vary from spot sanding and patching for localized pinholes to full re-sanding and re-coating if bubbles are widespread or caused by underlying moisture.
- Professional testing, surface preparation, and tailored moisture mitigation are essential to prevent reoccurrence and ensure a durable epoxy floor.
Table of Contents
- What Causes Epoxy Floor Bubbling? Spotting the Different Types
- Why Do Epoxy Floors Get Bubbles?
- How Can You Prevent Bubbles in an Epoxy Floor?
- How Do You Fix Bubbles in an Epoxy Floor?
- When Should You Call a Professional for Epoxy Bubbling?
- Why Surface Prep Determines Whether Bubbling Comes Back
- Get Your Garage Floor Diagnosed by a Professional
- Sources
- FAQ
What Causes Epoxy Floor Bubbling? Spotting the Different Types
Not every bubble tells the same story, and the fix depends entirely on which one you’re looking at. A little detective work with your eyes and a flashlight saves a lot of guesswork later.
- Outgassing pinholes: Small clustered holes, often with a slightly raised rim, forming while the coating is still curing. This happens when trapped air or vapor in the concrete substrate expands and escapes through the wet film.
- Entrained-air bubbles: Uniform, tiny bubbles spread evenly across a whole batch, usually traced back to how the epoxy was mixed rather than the slab underneath.
- Fisheyes: Small craters or circular voids where the coating pulled away from a contaminated spot, like a drop of oil, silicone, or leftover cleaner residue.
- Solvent popping: Fine, broken bubbles that appear after the surface has already started to skin over, caused by trapped volatiles trying to escape a film that’s curing too fast.
- Osmotic blisters: Domes that show up days, weeks, or even months after the job is done, often clustered near control joints or under skylights where moisture and heat cycle hardest.
Timing is the biggest clue. Defects that appear during application usually point to mixing or application technique. Blisters that show up long after the floor has cured almost always point back to moisture moving through the slab, per National Epoxy’s breakdown of common defect types. Map each defect’s location and photograph it. That record is worth more to a contractor than a verbal description.
Why Do Epoxy Floors Get Bubbles?
Outgassing is the single most common cause, and it comes down to basic physics. Concrete is porous, and it holds air and moisture in its capillary structure. When the slab warms up, whether from direct sun, a rising HVAC setting, or just the exothermic heat the epoxy itself generates while curing, that trapped air expands and looks for the fastest way out. The wet epoxy film is that path, and barometric pressure drops can trigger the same effect even without a temperature swing.
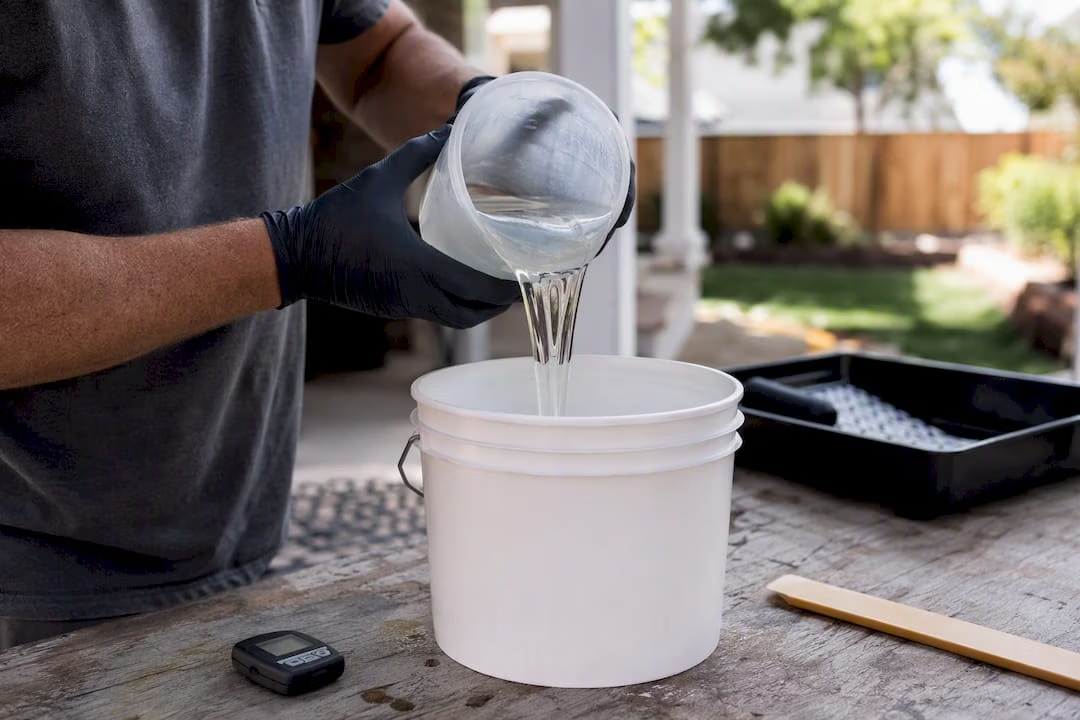
Mixing errors cause a different problem entirely. High-speed mixing, lifting the blade in and out of the pail, or working with cold, viscous resin all whip air into the material before it ever touches the floor. Cold material holds air and releases it poorly, which is why conditioning your material to room temperature matters more than most DIYers realize.
Contaminants create their own signature. Silicone, motor oil, and detergent residue change the surface tension of the concrete, and the epoxy simply can’t bond evenly across that spot, so it craters into a fisheye. Heat and exotherm play a role too. Thick pours generate more curing heat, which speeds up solvent evaporation and can cause popping if the surface skins before trapped gases have a chance to escape.
Moisture-mitigation systems are engineered for varying slab vapor emission rates up to around 25 lbs per 1,000 square feet per 24 hours, according to guidance on matching moisture test results to mitigation systems, which tells you how much variability exists between one garage slab and the next.
How Can You Prevent Bubbles in an Epoxy Floor?
Prevention starts before the roller ever touches concrete, and most of it comes down to testing what you can’t see and controlling what you can; these essential steps are detailed in Garage floor prep for epoxy: The DIY steps that actually matter.
- Test for moisture first. Run ASTM F1869 (the calcium chloride test, which measures vapor emission from the top half inch of slab) and ASTM F2170 (in-situ relative humidity, which reads moisture deeper in the concrete). When results are borderline, running both gives you a far more complete picture than either test alone.
- Seal or mitigate based on what the tests show. A low-viscosity penetrating primer handles mild moisture. Higher readings call for a high-build epoxy barrier or a full membrane system, since a single coat of primer often isn’t enough on a slab reading high on both tests.
- Control the environment during application. Apply while slab temperature is stable or falling rather than rising, since a warming slab is what drives outgassing in the first place. Keep direct sun and HVAC drafts off the wet film, and watch the weather for barometric swings.
- Mix at low speed. Condition your material to the manufacturer’s recommended temperature, mix at 100 to 300 rpm, and box multiple pails together for a consistent batch. High-speed mixing or lifting the blade out mid-mix is one of the most common ways installers introduce entrained air without realizing it.
- Backroll with a spiked roller. Rolling back over a freshly applied coat with a spike roller pops the air pockets while the film is still open, instead of letting them cure in place.
- Build in thin layers. Layering thinner tack coats and letting each one gel before the next reduces the exotherm that drives outgassing, and it gives the coating time to seal pores gradually instead of all at once.
Pro Tip: During primer application, run a porcupine roller (a metal roller covered in small spikes) over the surface as the primer soaks in. This pops bubbles while they’re still forming and lets the primer flow into the pinhole before the next coat locks it in place.
Our garage floor moisture protection checklist walks through how these steps fit together on a real job, start to finish.
How Do You Fix Bubbles in an Epoxy Floor?
The right repair depends entirely on how bad the bubbling is and whether it’s a surface problem or a moisture problem underneath.
For isolated pinholes:
- Sand the affected area down to sound material.
- Vacuum thoroughly to remove all dust.
- Wipe with a solvent like xylene (or a low-VOC alternative) to clean the surface.
- Patch with a thixotropic filler, which stays put instead of sagging.
- Feather the edges smooth and recoat once cured.
For widespread pinholing across large sections:
- Mechanically sand the whole area with 60 to 80 grit.
- Remove all dust completely before moving forward.
- Re-prime the slab and recoat at the correct dry film thickness listed on the manufacturer’s data sheet.
Osmotic blisters need a different approach entirely. Test the slab for moisture before touching anything, because patching over a blister without addressing what’s underneath almost always fails again within months. If moisture is confirmed, the source needs to be corrected or a proper vapor mitigation system installed before any new coating goes down. Wear appropriate respiratory protection when working with solvents, and always test adhesion on a small section before committing to a full recoat.
When Should You Call a Professional for Epoxy Bubbling?
Some bubbling is a five-minute fix. Some is a sign the whole installation needs to be redone properly, and knowing which one you’re dealing with matters.
Call a professional if you see:
- Bubbling across large sections of the floor rather than a few isolated spots
- Liquid visible under a blister when it’s popped
- Failures concentrated along control joints
- New defects appearing weeks or months after installation, not during the original cure
Any contractor you hire should hand you actual ASTM F1869 and F2170 moisture test results, a written description of the mechanical surface profile (CSP) they achieved, a specific primer or mitigation plan tied to your test numbers, and a written warranty. If a bid doesn’t include moisture testing at all, that’s worth asking about before you sign anything.
Why Surface Prep Determines Whether Bubbling Comes Back
Precision Concrete Coating in Conroe TX builds every job around mechanical surface prep and moisture testing before a drop of coating goes down, because skipping that step is where most bubbling problems start. Layered moisture mitigation gets applied when slab readings call for it, not as an afterthought after a floor already fails. That approach is also why the company backs its residential installations with a 15-year warranty. Prep work is invisible once the floor is finished, but it’s the difference between a floor that lasts and one that bubbles again next summer.
— William
Get Your Garage Floor Diagnosed by a Professional
Precision Concrete Coating in Conroe TX gives Texas homeowners something a DIY kit or a rushed installer can’t: real moisture testing before the coating goes down, not guesswork after it fails. We run ASTM-standard moisture checks, grind the slab to the correct mechanical profile, and match the primer or mitigation system to what your concrete actually needs, backed by a 15-year residential warranty on the finished floor.

If your existing floor is already showing bubbles, or you’re planning a new installation and want it done right the first time, our surface preparation process is the place to start. Reach out to schedule an inspection and get a written estimate based on what your slab actually tests at, not a one-size-fits-all quote.
Sources
- Why Does My Epoxy Floor Have Bubbles? | Sherwin-Williams
- ASTM F2170 vs F1869: Which moisture test fits your project? | IFTI
- Bubbles, pinholes and fisheyes in epoxy floors: What went wrong – National Epoxy
- Outgassing 101 — Epoxytec
FAQ
Will Bubbles in Epoxy Go Away on Their Own?
Small pinholes from minor outgassing sometimes stop appearing once the floor fully cures, but bubbles that are already formed in a hardened coating won’t flatten out or disappear on their own. Widespread bubbling or blisters typically need sanding and recoating, or moisture mitigation, to resolve permanently.
How Do You Get Air Bubbles Out of Epoxy Before It Dries?
While the coating is still wet, backroll the surface with a spiked roller to pop bubbles as they form, and use a porcupine roller during primer application to release trapped air before it gets sealed in.
How Do You Avoid Bubbles When Applying Epoxy?
Test the slab’s moisture with ASTM F1869 and F2170 before starting, mix material at low speed after conditioning it to room temperature, apply while slab temperature is stable or falling, and build the coating in thin layers rather than one thick pour.
How Do You Fix Air Bubbles in Epoxy That’s Already Dried?
Sand the affected area, vacuum and solvent-wipe the surface, patch with a thixotropic filler, and recoat once it’s feathered smooth; widespread bubbling usually requires full mechanical sanding and a fresh prime coat rather than spot patching.
One Response