
That white, powdery residue on your garage floor is almost certainly efflorescence, a salt deposit pushed to the surface by moisture moving through the concrete. It’s usually cosmetic, not structural, but it’s a warning sign you shouldn’t ignore. Brush or wipe away the surface deposits first, then run a simple moisture test before you paint, seal, or coat anything on top of it.
TL;DR:
- Efflorescence on garage floors indicates ongoing moisture movement, likely driven by groundwater, condensation, or leaks, which must be addressed to prevent recurrence.
- Removing efflorescence requires careful, stepwise cleaning with brushing, rinsing, and potentially mild acids, avoiding aggressive chemicals unless necessary, and always testing before sealing.
- Active moisture testing with plastic sheets or calcium chloride kits is essential to confirm if the slab is dry enough for coatings, with in-slab probes providing the most accurate results.
- Persistent or widespread efflorescence, moisture on drywall, or failure of previous coatings signals the need for professional moisture mitigation and proper substrate preparation.
- DIY removal can be effective for light cases, but if moisture persists or coatings keep failing, hiring a specialist ensures correct diagnosis, surface preparation, and durable finishing.
Table of Contents
- What Causes Efflorescence on a Garage Floor
- Efflorescence vs. Mold, Paint Residue, and Laitance
- How Do You Remove Efflorescence From a Garage Floor?
- How Do You Test for Moisture in a Concrete Slab?
- How to Prevent Efflorescence From Coming Back
- What a DIY Fix Really Looks Like vs. a Professional Job
- When to Call In a Concrete Coating Professional
- Sources
- FAQ
What Causes Efflorescence on a Garage Floor
Concrete is full of soluble salts, mostly calcium hydroxide left over from the curing process, along with sulfates and chlorides depending on the mix and soil. When water moves through the slab, it dissolves those salts and carries them along for the ride. As the water reaches the surface and evaporates, it leaves the dissolved minerals behind as a crystallized film. That film is the white powder you’re looking at, and the most common version is calcium carbonate, formed when calcium hydroxide reacts with carbon dioxide in the air.
The water itself moves through concrete in a few ways: capillary action drawing moisture upward through tiny pores, vapor drive pushing humidity from a damp subgrade toward drier air above, and in worse cases, hydrostatic pressure forcing groundwater straight through the slab. The driving force is almost always capillary action pulling moisture and dissolved salts to the surface.
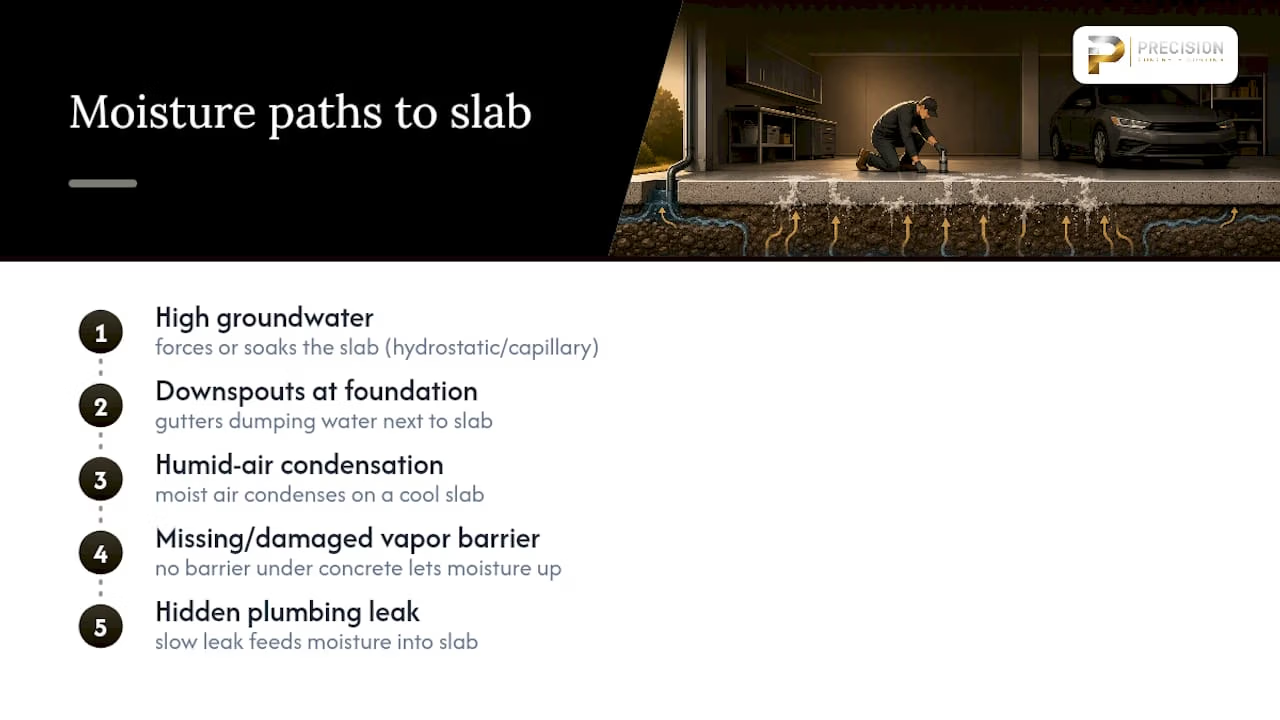
Common culprits behind that moisture include high groundwater tables, gutters and downspouts dumping water next to the foundation, condensation from humid air hitting a cool slab, a missing or damaged vapor barrier under the concrete, or a slow plumbing leak nobody’s noticed yet.
Efflorescence vs. Mold, Paint Residue, and Laitance
A quick field test settles most confusion. Efflorescence rubs off as a dry, chalky powder when you drag your finger across it. Mold, on the other hand, is biological. It often looks fuzzy or discolored, clings to the surface, and won’t wipe away clean the way a mineral deposit does.
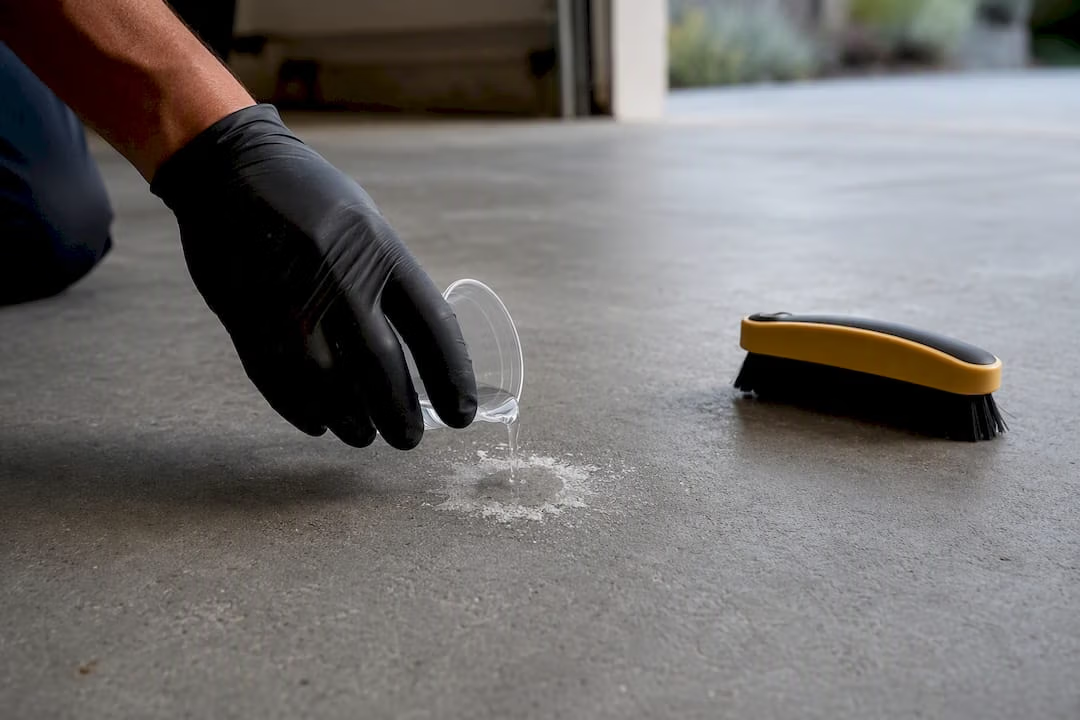
Here’s a test that works in about five minutes: wet a small patch of the residue. Efflorescence typically dissolves in the water and, if the moisture problem is still active, comes back once the area dries out again. Paint residue or laitance, the weak cement film left on newly poured concrete, behaves differently. It might soften or flake, but it won’t dissolve and reappear the same way.
Watch for variations too. Hard, crusty buildups can mean the calcium carbonate has been accumulating for a long time, and technical guidance from masonry researchers notes these tougher deposits sometimes need more aggressive mechanical removal. Colored deposits, especially rust or orange tinting, can point to iron content or a different moisture pathway entirely.
How Do You Remove Efflorescence From a Garage Floor?
Removal is a matter of working from gentle to aggressive, testing a small spot before you commit to the whole floor. Skipping steps or jumping straight to acid is how homeowners end up with etched concrete and no better results.
- Suit up and clear loose salts. Wear gloves and eye protection, then sweep or shop-vac the loose powder off the surface before you introduce any liquid.
- Dry-brush first. A stiff-bristle broom or nylon scrub brush knocks a surprising amount of efflorescence loose without any chemicals at all.
- Rinse and scrub. Hose the area down and work it with a stiff nylon brush. For light cases, this step alone often finishes the job.
- Step up to vinegar or a labeled cleaner for stubborn spots. A diluted vinegar solution or a commercial concrete cleaner handles most residue that survives the brush and rinse.
- Reach for a phosphoric acid etcher only if deposits persist. Follow the label’s dilution ratio exactly, and always test an inconspicuous corner first.
- Treat muriatic acid as the last resort. It’s effective on heavy, crusted efflorescence, but it’s also caustic. Dilute it according to the manufacturer’s instructions, apply in a well-ventilated space, and never mix it with anything but water.
- Rinse thoroughly, then neutralize. A baking soda and water solution neutralizes any leftover acid residue after an etch treatment. NCMA guidance lists dry-brushing, water flushing, and dilute acid as the standard progression, always paired with fixing the moisture source.
- Let the slab dry completely before sealing or coating. Rushing this step is one of the most common reasons coatings fail within months.
Pro Tip: Skip straight to a diluted vinegar rinse on light, fresh efflorescence before you touch anything acidic. It’s gentler on the concrete and saves the harsher chemicals for buildup that actually needs them.
How Do You Test for Moisture in a Concrete Slab?
Removing the powder without checking for active moisture is a temporary fix at best. A few tests, ranging from a garbage bag to a certified kit, tell you what’s really happening under the surface.
- Plastic-sheet test: tape a two-foot square of clear plastic to the floor, sealing all four edges, and leave it for 72 hours. Darkened concrete or visible condensation under the sheet signals active moisture moving through the slab.
- Calcium chloride test (ASTM F1869): a small dish of calcium chloride sits under a sealed dome for 60 to 72 hours and gets weighed before and after. This quantifies the actual moisture vapor emission rate rather than giving a yes-or-no answer, which is why it carries more weight with contractors and coating manufacturers.
- Moisture meters and relative-humidity probes: handheld meters give a fast surface reading but miss what’s happening deeper in the slab. In-slab RH probes, drilled into the concrete for lab-grade accuracy, are the gold standard when you’re planning a permanent coating and need to know exactly what you’re dealing with.
If the plastic-sheet test comes back positive, that’s usually your cue to move from a DIY sealer toward professional moisture testing before spending money on a finish.
How to Prevent Efflorescence From Coming Back
Cleaning the surface without fixing the water source is like mopping up a leak instead of turning off the faucet. The efflorescence comes back, sometimes within weeks, because nothing changed about how water is entering or moving through the slab.
Start outside. Extend downspouts away from the foundation, regrade any low spots that pool water against the garage wall, and clear gutters so they’re actually doing their job. These fixes solve a huge share of residential moisture problems before you spend a dollar on anything for the slab itself.
Inside, a dehumidifier keeps ambient humidity down and reduces condensation on cool concrete during humid months. Seal the joint where the floor meets the foundation wall, and track down any slow plumbing leaks that might be feeding moisture from below.
For the slab itself, treatment depends on how bad the moisture drive is:
- Densifiers reduce surface porosity and give the concrete less room to wick moisture upward.
- Penetrating silane or siloxane sealers repel liquid water while still letting vapor pass through, which matters because trapping vapor under the wrong product causes new problems.
- Dampproof primers or polymer toppings handle moderate vapor drive that a basic sealer can’t manage on its own, especially on slabs without an original vapor barrier.
Pro Tip: Never apply a film-forming coating like epoxy over a slab you haven’t tested. Salts trapped underneath a solid film cause delamination, and you’ll be stripping and redoing the whole job within a year or two.
Garage floor moisture protection strategies from outdoor material specialists echo the same order of operations: control water at the source before you ever touch the finish coat.
What a DIY Fix Really Looks Like vs. a Professional Job
A weekend project and a professional mitigation job aren’t the same undertaking, and confusing the two is where most repeat failures start. Light, surface-level efflorescence with no active moisture reading usually clears up in an afternoon: brush, rinse, dry, done. A slab with a real vapor drive problem is a different animal entirely, often requiring one to two weeks of drying time alone before any coating goes down, plus the testing period beforehand.
The biggest mistake I see is painting or coating over a floor that still tested positive for moisture. The coating looks great for a few months, then salts building up underneath push it apart from the inside. Skipping the plastic-sheet or calcium chloride test to save a weekend almost guarantees you’ll redo the work later.
If the bloom keeps returning after multiple cleanings, if you notice damp drywall near the garage, or if moisture covers a wide area rather than one isolated patch, that’s your signal to bring in a specialist rather than buy another jug of sealer.
— William
When to Call In a Concrete Coating Professional
If your moisture test keeps coming back positive, or a DIY sealer already failed once, hand-brushing and hardware-store cleaner have reached their limit. That’s the point where a coating contractor’s testing equipment and prep tools start paying for themselves instead of just adding another weekend to your to-do list.

A professional job typically starts the same way your own diagnosis should: calcium chloride or in-slab RH testing to know exactly how much moisture you’re dealing with. From there, Precision Concrete Coating in Conroe TX grinds the substrate with diamond tooling or shot blasting to open the pores properly, repairs any cracks or pitting, and applies densifiers or primers matched to your slab’s actual moisture reading rather than a one-size-fits-all product. The finish system, whether that’s a full-flake decorative epoxy or a UV-stable polyaspartic topcoat, goes down only after the substrate is confirmed dry and prepped. Residential installations are typically covered by a substantial warranty, providing more assurance than hardware store sealers. If you’ve already run your own moisture test and the results have you second-guessing a DIY finish, request a written estimate and find out what proper prep looks like for your specific slab.
Sources
For readers who want to go deeper, the NCMA’s technical guidance on efflorescence control covers removal methods and moisture diagnosis in more technical detail. Practical walkthroughs on running a plastic-sheet or calcium chloride test and a step-by-step prevention guide round out the DIY side of the research.
- Efflorescence in concrete: causes, prevention and remediation — Code Concrete
- Control and removal of efflorescence — NCMA TEK
- How to Fix Efflorescence on a Concrete Floor (and Stop the Bloom Coming Back) — CompositePaint
FAQ
Will Efflorescence Eventually Go Away on Its Own?
Not permanently. It stops appearing only once the moisture source feeding it gets fixed; otherwise, cleaned salts are replaced by new deposits as more moisture migrates to the surface.
Can You Just Paint Over Efflorescence?
No. Painting or coating over active efflorescence traps salts under the film, and the buildup pushes the coating apart from underneath within months, causing peeling or bubbling.
Should I Be Worried About Efflorescence on My Garage Floor?
Usually not from a structural standpoint since it’s a surface mineral deposit, but it does signal moisture movement worth investigating, especially if it keeps reappearing after cleaning or covers a large area.
Does Efflorescence in Concrete Go Away After Cleaning?
Cleaning removes the visible salts immediately, but it comes back if water is still moving through the slab. A plastic-sheet or calcium chloride test tells you whether the underlying moisture problem is still active.
How Do I Know If I Need a Professional for Efflorescence?
If a moisture test comes back positive, if a previous coating has already failed, or if you’re seeing damp drywall or widespread dampness, that’s beyond a weekend DIY fix and worth a professional assessment.