A pre-installation surface condition inspection determines whether your garage floor coating will bond permanently or peel within a year. Before any coating goes down, a qualified installer verifies six things: contaminant presence (oil, grease, paint, sealers), moisture levels via ASTM F2170 in-situ relative humidity or ASTM F1869 calcium chloride testing, concrete surface profile against ICRI CSP standards, crack and spall condition, existing coatings or laitance requiring removal, and pull-off adhesion potential. In Conroe and the surrounding North Houston area, the combination of high humidity, clay-heavy soil, and temperature swings makes every one of those checks load-bearing. Skip moisture testing here and you are gambling on a slab that may be pushing vapor through the concrete year-round.
- Contaminants: Oil, grease, paint, and sealers block mechanical bonding; degreasing must precede any grinding
- Moisture testing: ASTM F2170 in-situ RH or ASTM F1869 calcium chloride (MVER); typical epoxy acceptance is ≤75% RH or ≤3 lbs MVER
- Surface profile: ICRI CSP verification using comparison chips; CSP 2–3 is the standard target for thin-mil and decorative flake systems
- Cracks and spalls: Documented and repaired before coating; crack repair is not optional
- Existing coatings or laitance: Failed coatings must be fully removed — coating over a failed system bonds to the failure, not the slab
- Adhesion check: Pull-off testing where bond strength verification is warranted
Inadequate surface preparation is the leading cause of coating failure, not the product itself. Diamond grinding creates a repeatable, measurable profile that acid etching cannot match.
Table of Contents
- What you need to confirm before signing any installer contract
- Why installers who know their craft start with the slab, not the coating
- Key Takeaways
- What the prep obsession actually tells you about an installer
- Get a documented surface inspection before your Conroe garage floor is coated
What you need to confirm before signing any installer contract
Surface condition evaluation is not just a technical formality. It directly controls your timeline, your final cost, and whether a 15-year warranty is even achievable.
Timing: A standard two-car garage typically requires several days of prep before coating begins. If the inspector finds high moisture readings, heavily contaminated concrete, or an existing failed coating, expect additional time and cost for moisture mitigation primers, a full re-grind, or concrete laitance removal.
What to request in writing before work starts:
- Moisture test results with actual RH percentage or MVER value (not just “passed”)
- ICRI CSP chip match or documented CSP target for your specific coating system
- Confirmation of degreasing and HEPA-vacuumed dust removal after grinding
- Planned crack and joint repairs, plus primer specification for porous slabs
Acceptance thresholds to know: For most epoxy and polyaspartic systems, ≤75% RH or ≤3 lbs MVER is the standard pass threshold. Ask for photos at each prep stage. If an installer cannot produce documented readings, that is your answer about their process. Concrete control joints also need assessment — flexible fillers, not rigid patching, are the right call there.
Why installers who know their craft start with the slab, not the coating
Installers prioritize surface preparation because a proper mechanical bond eliminates the most common failure modes before the first drop of coating is mixed. The sequence matters: degrease first, then grind to target CSP, then HEPA vacuum, then test moisture, then repair cracks, then prime where needed. Reversing any step contaminates the next one.
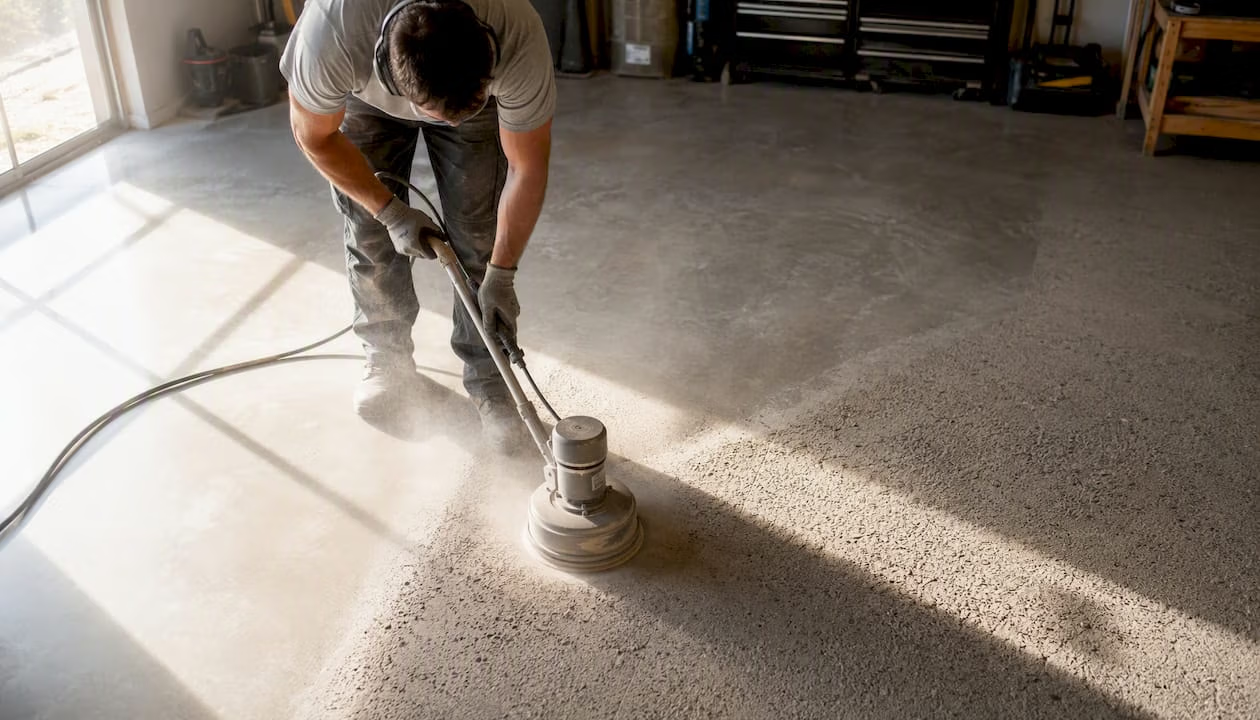
Diamond grinding to ICRI CSP 2–3 creates a mechanical bond that, when executed correctly, can exceed the concrete’s own tensile strength. The slab would fail before the coating lifts. That is the standard worth holding installers to.

In Conroe specifically, Texas humidity and soil conditions push moisture vapor through slabs at rates that surprise homeowners. Polyaspartic topcoats handle hot-tire pickup and UV exposure better than standard epoxy in this climate. RH testing depth matters here too — shallow readings can miss moisture migrating from below. The professional prep sequence accounts for all of it, and documented prep steps are what support a warranty claim if something ever goes wrong.
Pro Tip: Ask your installer to photograph the ICRI chip match and the moisture meter reading side by side. Keep those photos with your warranty paperwork.
Key Takeaways
A coating’s lifespan is decided before the first bucket opens — surface condition inspection is what separates a durable floor from an expensive callback.
| Point | Details |
|---|---|
| Moisture testing is non-negotiable | Request ASTM F2170 or F1869 results in writing; ≤75% RH or ≤3 lbs MVER is the standard epoxy pass threshold |
| CSP verification protects your bond | Insist on ICRI chip match to CSP 2–3 before coating starts; diamond grinding is the only repeatable method |
| Failed coatings must come off | Coating over a failed system bonds to the failure; full removal is required for a new system to hold |
| Prep timeline affects your budget | A two-car garage typically needs 1.5–3 days of prep; moisture issues or existing coatings add time and cost |
| Precision-concretecoating | Performs the full documented prep sequence in Conroe, TX, linking verified surface condition to a 15-year residential warranty |
What the prep obsession actually tells you about an installer
Most homeowners focus on the finished floor. Experienced installers focus on the slab. That gap in attention is where most coating failures are born.
The conventional wisdom says “good product, good result.” The reality is that surface prep mistakes cause the overwhelming majority of failures, and the product rarely gets the blame it doesn’t deserve. An installer who skips documented moisture testing is not cutting corners on paperwork. They are skipping the one check that would tell them whether the coating will bond at all.
In North Houston’s climate, this matters more than in drier markets. Vapor drive is real here, and a slab that tests fine in February can read differently in August. The installers worth hiring test, document, and adjust. The ones to avoid show up with a grinder and a price.
Get a documented surface inspection before your Conroe garage floor is coated
A pre-installation surface inspection from Precision-concretecoating gives you something most quotes don’t: written documentation of your slab’s actual condition before a single coat goes down.

The process covers degreasing, diamond grinding to verified ICRI CSP, ASTM moisture testing with recorded values, crack and joint repair, HEPA vacuuming, and written recommendations if mitigation is needed. That documentation is also what supports the 15-year residential warranty and helps produce an accurate written estimate with no hidden-cost surprises after the job starts. See a real local example in the Granger Pines case study to understand what a fully documented prep process looks like from start to finish. Contact Precision-concretecoating to schedule your surface inspection and get a written estimate based on what your slab actually needs.