Amine blush is a waxy, water-soluble film that forms on curing epoxy when amine hardeners react with moisture and carbon dioxide in the air. If you see it, don’t reach for sandpaper. Wash the surface with warm water and mild detergent using a Scotch-Brite pad, rinse thoroughly, and let it dry completely before testing or recoating.
TL;DR:
- Proper environmental control prevents most amine blush formation, especially maintaining substrate temperature at least 5°F above dew point and avoiding direct-fired heaters.
- Water and mild detergent washing with a Scotch-Brite pad effectively removes amine blush, while solvents are ineffective and may damage the epoxy surface.
- Confirm surface cleanliness with pH testing or an amine-swab kit to ensure blush is fully removed before recoating.
- Failing to address blush can cause poor adhesion, delamination, yellowing, and costly rework over time.
- Blush risk is higher with ambient-cured epoxies, porous concrete substrates, and thin-film coatings in high humidity or low-temperature conditions.
Table of Contents
- What Causes Amine Blush in Epoxy Coatings
- How to Tell If Your Epoxy Has Amine Blush
- Preventing Amine Blush Before It Starts
- How to Remove Amine Blush Without Damaging the Coating
- Confirming the Surface Is Ready to Recoat
- When Sanding or Professional Help Makes Sense
- A Field-Tested Blush Checklist From Precision Concrete Coating
- Does Amine Blush Affect Every Type of Epoxy the Same Way?
- What Happens If You Ignore Amine Blush and Recoat Anyway
- Which Amine Blush Removal Methods Actually Work
- Best Environmental Conditions for Applying Epoxy
- Why Prevention Beats Every Removal Method on the Market
- Sources
- FAQ
What Causes Amine Blush in Epoxy Coatings
Amine hardeners are hygroscopic, meaning they pull moisture out of the air, and that trait is the root of the problem. When unreacted amine molecules migrate to the surface during cure, they react with atmospheric moisture and CO2 to form carbamates and ammonium bicarbonate, waxy salts that sit on top of the coating instead of curing into it, according to KTA’s research on amine exudate.
That film does more than look bad. It can leave the epoxy directly beneath it undercured, and it acts as a bond breaker for whatever coat goes on next. Recoat over blush without removing it, and you risk delamination, yellowing, and a dull, cloudy finish that never fully hardens.
Blush isn’t the only thing that can show up on curing epoxy, though. Bloom is a different phenomenon tied to certain resin chemistries and low humidity, while dust and surface oils are contamination issues, not chemical byproducts. The tell here: blush washes away with water. Oils and dust usually don’t respond the same way, and they won’t produce the alkaline pH reading blush typically leaves behind.
How to Tell If Your Epoxy Has Amine Blush
Blush shows up in a few recognizable ways, and catching it early saves you a headache before recoating.
- Greasy or waxy patches that look slightly cloudy or milky against the surrounding cured epoxy.
- Crystalline deposits in isolated spots, especially in corners or low-airflow areas where humidity lingers.
- Tackiness that won’t go away. If the surface still feels sticky or slightly soft days after it should have cured hard, that’s a strong signal.
- Uneven gloss. Blush often shows as dull patches next to areas with normal sheen.
Don’t rely on one test alone. A simple field check with pH paper works well. Blush residue tends to read alkaline, while properly cured, clean epoxy reads close to neutral. Commercial amine-swab kits offer a more definitive answer, and a quick wet-scrub test on a small area tells you fast whether the film dissolves in water, confirming it’s blush and not a coating defect or contamination. Check more than one spot, because surface contaminants can mimic blush closely enough to fool a single test.
Preventing Amine Blush Before It Starts
Prevention beats remediation every time, and most of it comes down to controlling the environment and respecting the product’s chemistry.
- Keep the substrate temperature safely above the dew point to prevent condensation and reduce the risk of amine blush. Condensation on a curing surface is one of the fastest routes to blush, and Sherwin-Williams’ technical guidance treats this as the baseline rule for any epoxy job. Dehumidifiers and HVAC control matter more in a closed garage than most people expect.
- Cure warmer, not colder. The primary epoxy-amine reaction slows dramatically in cold, damp conditions, and the reaction rate decreases significantly as temperature drops, approximately halving for every 10°C decrease, according to research published in PCI magazine. That wider window gives amines more time to migrate to the surface and react with moisture instead of crosslinking properly.
- Respect induction time and mix ratios. Skipping the sweat-in period or eyeballing your ratios leaves excess free amine available to migrate toward the surface.
- Consider non-blushing hardener formulations. They reduce risk, according to Epoxyworks, but don’t treat the label as a guarantee. Test the cured surface anyway.
- Use closed curing or peel ply for critical or small parts. Increasing pot mass generates more exotherm, which speeds cure and shortens the amine migration window, a tactic detailed by Meridian Adhesives.
- Skip the salamander heater. Direct-fired propane or kerosene heaters pump both moisture and CO2 into the air, which is exactly what you’re trying to avoid.
Pro Tip: Check the dew point the night before a pour, not the morning of. Overnight temperature swings in a garage can push you into blush territory before you’ve even mixed the first batch. Related conditions worth checking ahead of time are covered in our guide on how humidity affects garage floor coatings.
How to Remove Amine Blush Without Damaging the Coating
Solvents feel like the obvious fix, but acetone and MEK do more harm than good here. Amine blush is water-soluble, not oil-based, so a solvent wipe just smears the film around or, worse, softens the epoxy underneath before it’s fully cured. Warm water and mild detergent are what actually dissolve and lift the residue, a method TotalBoat’s technical support team recommends as the standard fix.
Here’s the process, step by step:
- Mix warm water with a mild dish detergent. Skip anything with ammonia or strong degreasers.
- Scrub with a Scotch-Brite pad or a soft bristle brush, working in overlapping passes across the whole surface.
- Change the water frequently. Dirty water just redeposits dissolved blush back onto the surface.
- Repeat the wash cycle until a clean, wet rag wiped over the area comes away without any waxy film or cloudy residue.
- Rinse thoroughly with clean, potable water to remove all detergent residue, since leftover soap can interfere with adhesion just like blush does.
- Let the surface dry completely before testing pH or attempting a recoat.
For potable water tanks or certified systems, manufacturers sometimes specify alkaline cleaners or high-pressure rinsing protocols under standards like AWWA C653, so always defer to the coating manufacturer’s own remediation steps for those applications.
Only reach for light abrasion if a hazy film remains after a complete, patient washing. Sanding first, before you’ve even tried water and detergent, just grinds the waxy residue deeper into the surface texture instead of removing it.
Wear gloves and eye protection during scrubbing, and collect your rinse water rather than letting it run straight into a storm drain, especially if you used any cleaning additives beyond plain detergent.
Confirming the Surface Is Ready to Recoat
Don’t skip verification just because the surface looks clean. A few quick checks separate a good recoat from an expensive redo.
- Run a pH test. Properly washed epoxy should read close to neutral; an elevated alkaline reading means blush residue is still present somewhere.
- Use an amine-swab kit if you have one. Field kits like the Elcometer 139 or the TQC Amine Blush Kit give a more definitive answer than pH paper alone.
- Do a visual and tactile pass. Look for any remaining haze and feel for tackiness across the entire surface, not just the spots you remember being bad.
- Test recoat a small, inconspicuous area first if you’re at all unsure, and check the manufacturer’s PDS for the acceptable recoat window before committing to the whole floor.
When Sanding or Professional Help Makes Sense
If a thorough wash removes the film completely, you don’t need to abrade anything. Abrasion becomes necessary only when a hazy or slightly undercured layer remains after washing, since a light scuff restores the surface profile new coating needs to bond properly.
Some manufacturers note that certain formulations blush more readily under specific humidity or temperature ranges, and their PDS will spell out remediation steps and recoat windows for exactly that scenario. Follow those instructions over general advice when they’re available.
For potable-water systems, warranty-covered installations, or any large commercial floor where a failed recoat gets expensive fast, it’s worth consulting the manufacturer directly or bringing in a professional installer rather than guessing. That’s especially true when the surface in question is something you’re planning to live with for the next 15 years.
A Field-Tested Blush Checklist From Precision Concrete Coating
On garage floor jobs, Precision Concrete Coating in Conroe TX builds blush prevention into the prep sequence rather than treating it as an afterthought. Texas humidity swings hard between seasons, and a slab that reads fine at 7 a.m. can sit right at dew point by mid-morning.
The practical checklist looks like this:
- Before mixing: check dew point against slab temperature, precondition resin and hardener to a stable room temperature, and set up dehumidification or indirect heat if conditions are marginal.
- During application: respect full induction time, mix to exact ratios, and avoid small test batches that don’t generate enough exotherm to cure cleanly.
- After cure: run pH and swab checks before any topcoat goes down, wash with warm water and detergent if anything reads off, confirm the surface is fully dry, then recoat within the product’s PDS window.
This is also why surface preparation carries so much weight in a coating system that’s backed by a 15-year residential warranty. A warranty is only as good as the prep underneath it, and blush left unaddressed is one of the more common, and more avoidable, reasons a coating fails early.
Does Amine Blush Affect Every Type of Epoxy the Same Way?
Not quite. Ambient-cured epoxies, the kind used in most garage floor and DIY projects, are particularly vulnerable because they rely entirely on room-temperature chemistry with no oven or heat-assisted cure to speed things along. That gives amine molecules a longer window to migrate to the surface before the resin locks up.
Heat-cured or two-part systems used in some industrial and marine applications face less risk simply because elevated cure temperatures push the crosslinking reaction faster than moisture can interfere. Thin-film coatings blush more readily than thick pours too, since a thin layer generates less exotherm and cools faster, extending the vulnerable window.
Substrate matters as well. Porous concrete tends to hold more surface moisture than sealed wood or metal, which means a concrete garage floor can be more prone to blush than a coated tabletop or a fiberglass hull, all else being equal. Vertical surfaces behave differently than horizontal ones too. Runs and drips on a wall can trap moisture in ways a flat floor pour doesn’t.
None of this means some epoxies are immune. It means the risk profile shifts based on formulation, film thickness, cure method, and what’s underneath the coating. A solid color epoxy on a garage slab and a metallic epoxy on the same slab face the same environmental risks, but the metallic system’s thinner application technique can leave less margin for error if the room’s humidity climbs mid-application.

What Happens If You Ignore Amine Blush and Recoat Anyway
Recoating over unaddressed blush doesn’t just risk a cosmetic issue. It sets up a failure that tends to get worse with time and use, not better.
The waxy film prevents the new coat from forming a mechanical and chemical bond with the layer beneath it. In the short term, that shows up as poor adhesion, sometimes visible as fisheyes or a slightly milky cast in isolated patches. Over months, foot traffic, tire rolling loads in a garage, or temperature cycling exploits that weak bond, and coating starts to peel or delaminate in sheets, often starting at edges or high-traffic zones.
Untreated blush left under the topcoat can also continue reacting with ambient moisture over time, since the amine byproduct doesn’t necessarily stop being hygroscopic just because it’s sealed in. That can contribute to gradual yellowing or a chalky surface appearance well after the coating looked fine on install day.
The financial cost compounds too. A coating that delaminates within a year or two usually needs full removal, often via mechanical grinding, before a new system can go down. That’s a far more expensive and disruptive process than the twenty extra minutes it takes to wash and verify a surface before the first recoat. If you’re evaluating why a previous coating job is already bubbling or lifting, that pattern lines up closely with what causes garage floor coating failure more broadly, and blush is one of the more common hidden culprits.
Which Amine Blush Removal Methods Actually Work
Homeowners searching for a fix often land on a handful of approaches, and they are not interchangeable in effectiveness.
Warm water and mild detergent with a Scotch-Brite pad remains the most consistently recommended method across manufacturer technical support, and it works precisely because blush is water-soluble. This is the method TotalBoat walks through in detail, and it’s the right first move on nearly every job.
Solvent wiping (acetone, MEK, denatured alcohol) shows up in a lot of older DIY advice, but it’s largely ineffective and sometimes damaging. Solvents don’t dissolve the waxy salts the way water does, and on epoxy that hasn’t fully cured, they can soften or mar the surface.
Alkaline cleaners with high-pressure rinsing are specified for certain commercial and potable-water applications, where regulatory standards demand a more aggressive protocol. For a garage floor, this is overkill, and the chemicals involved need careful, code-compliant disposal.
Mechanical abrasion alone, sanding without washing first, is the least effective option and the one most likely to cause problems. It grinds the waxy film into the surface texture rather than removing it, and it should only follow a wash, never replace one.
For most residential jobs, the water-and-detergent method resolves the issue completely. If a haze persists after several thorough wash cycles, that’s the signal to move to light abrasion, not to skip straight to solvents or sanding out of frustration.
Best Environmental Conditions for Applying Epoxy
Getting the environment right before you ever open a can of hardener prevents more blush than any cleanup method fixes after the fact.
Aim for ambient temperatures in the range your product’s PDS specifies, typically somewhere between 60°F and 85°F for most residential epoxy systems, and avoid applying on days where the forecast shows a big overnight temperature drop. A slab that’s warm at 2 p.m. but drops toward dew point by 9 p.m. can develop blush hours after you’ve gone to bed thinking the job went fine.
Humidity control matters as much as temperature. Keep relative humidity below the threshold your product specifies, and when you can’t control the outdoor air, close the garage and run a dehumidifier rather than fans, since fans alone just move humid air around without removing moisture. Moisture testing before you even start the job catches slab-level moisture issues that no amount of environmental control during application will fix.
Avoid combustion heaters entirely. A propane or kerosene salamander heater raises air temperature, but it also releases water vapor and carbon dioxide directly into the workspace, feeding the exact chemical reaction you’re trying to prevent. Indirect electric heat or a properly vented HVAC system is the safer route.
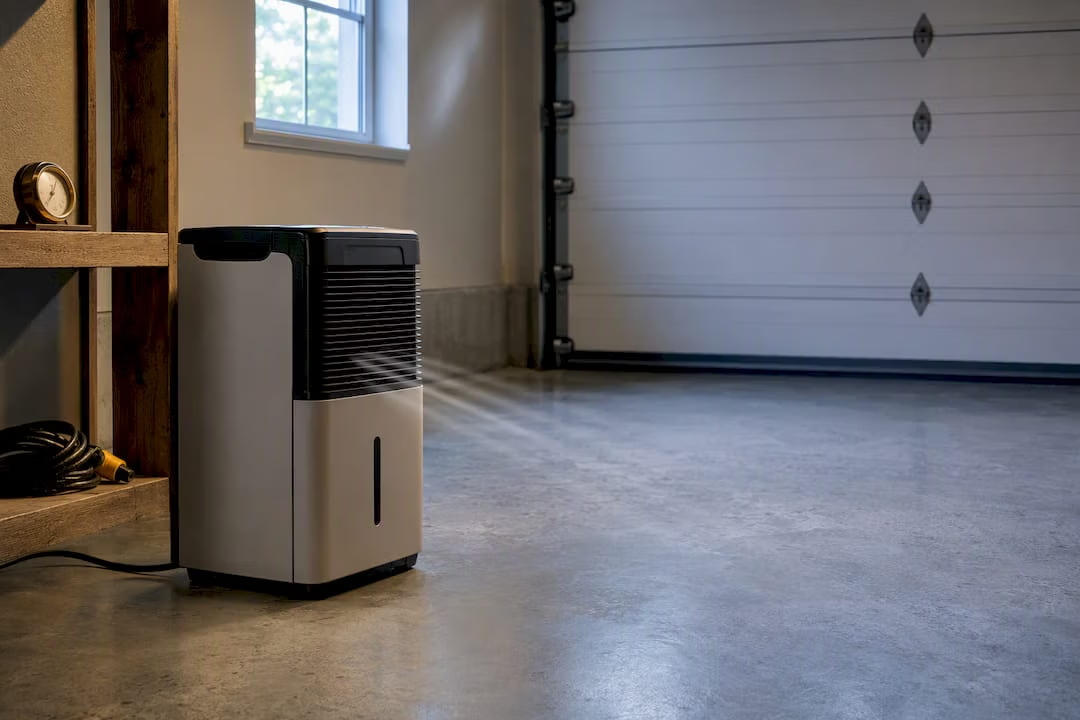
Finally, schedule around the calendar, not just the day. Spring and early fall mornings in humid regions often sit right at the dew point threshold, so late morning or early afternoon application windows, once the sun has had time to work, tend to produce more reliable cures than a 7 a.m. start.
If your project involves cleanup around the vehicle or garage interior during the process, these waterless cleaning steps offer a practical way to keep the space tidy without introducing extra moisture at the wrong time.
Ready for a coating system that accounts for all of this from day one? This company builds environmental control and surface verification into every surface preparation process, backed by a long-term residential warranty that reflects confidence in the prep work, not just the topcoat.
Why Prevention Beats Every Removal Method on the Market
Every credible source on this topic, from KTA to Sherwin-Williams to Epoxyworks, agrees on the chemistry. Where the conventional advice tends to fall short is in how it’s framed for homeowners: as a cleanup problem instead of a scheduling and environmental problem.
Most DIY guidance treats amine blush like a surface stain you scrub away and move on from. That’s true as far as it goes, but it misses the more useful lesson. Blush is a symptom of poor timing, usually a cure that happened in conditions the product wasn’t designed for. The removal steps matter, and every homeowner should know them. But the real skill, the one that separates a garage floor that lasts fifteen years from one that needs redoing in two, is reading the dew point and the forecast before you ever crack open the hardener.
If there’s one thing worth prioritizing first, it’s this: stop treating environmental control as optional prep work and start treating it as part of the coating system itself. A $40 dehumidifier rental or a rescheduled application date costs far less than regrinding a delaminated floor. The chemistry doesn’t negotiate, and no amount of scrubbing after the fact replaces getting the conditions right the first time.
— William
Sources
- What is amine blush on cured epoxy and how do I remove it? – TotalBoat
- The Formation of Amine Exudate (Blushing) of Epoxy Coatings — KTA
- How to Identify, Prevent & Remove Amine Blushing Epoxy — Sherwin‑Williams
- What is Amine Blush? — Epoxyworks
- Understanding Amine Blush in Ambient-Cured Epoxies — Meridian Adhesives
FAQ
How Do You Remove Amine Blush From Epoxy Resin?
Scrub the surface with warm water and a mild detergent using a Scotch-Brite pad, changing the water frequently, then rinse thoroughly with clean water and let it dry fully before testing or recoating. Avoid solvents like acetone, since blush is water-soluble and solvents can damage epoxy that hasn’t fully cured.
How Can You Avoid Amine Blush in the First Place?
Keep the substrate at least 5°F above the dew point, control humidity with a dehumidifier rather than fans, respect the product’s induction time, and avoid direct-fired heaters that add moisture and CO2 to the air. Choosing a non-blushing hardener formulation can help, but testing the cured surface is still worthwhile.
What Does Amine Blush Feel Like?
It often feels slightly tacky or greasy even after the epoxy should be fully cured, and it may look cloudy, waxy, or crystalline compared to the surrounding gloss. A wet-scrub test is a quick way to confirm: if the film dissolves in warm water, it’s blush.
Does Epoxy React With Amine Hardener to Cause Blush?
Yes. Amine curing agents are hygroscopic and react with moisture and carbon dioxide in the air during cure, forming carbamates and ammonium bicarbonate salts that sit on the surface as a waxy film rather than curing into the coating.