
Most epoxy coatings go on best between 55°F and 85°F ambient, with the concrete slab itself sitting in that same range. The rule that actually saves a job: the substrate must stay at least 3 to 5°F above the dew point before, during, and after application. Go below the manufacturer’s minimum without adjusting for it, and you risk a soft, tacky floor that never fully hardens.
TL;DR:
- Epoxy applications should be planned for ambient temperatures between 55°F and 85°F, with the substrate at least 5°F above the dew point during installation.
- Standard epoxies require a minimum substrate temperature of around 60°F, while low-temperature formulations can cure at 35°F to 45°F, but at a slower rate.
- High temperatures above 85°F shorten pot life, necessitating smaller batches, shaded storage, and scheduled application during cooler parts of the day.
- Monitoring substrate temperature and dew point with proper tools is critical to avoiding moisture-related failures like blistering or delamination.
- Proper cold-weather or hot-weather epoxy application involves specific preparation steps, including heating components and the slab, and adjusting curing procedures accordingly.
Table of Contents
- Optimal Epoxy Temperature Ranges at a Glance
- How Temperature Changes the Epoxy Curing Chemistry
- Substrate Temperature vs Air Temperature: The Dew Point Rule
- Cold-Weather Epoxy Application: A Practical Checklist
- Hot-Weather Epoxy Application: Managing the Fast Cure
- How Long Epoxy Takes to Cure at Different Temperatures
- What a Professional Checks Before Coating a Garage Floor
- Why Most Epoxy Failures Trace Back to One Missed Reading
- Get a Temperature-Checked Garage Floor Assessment
- Sources
- FAQ
Optimal Epoxy Temperature Ranges at a Glance
The number that matters most is on the technical data sheet, and it varies more than most homeowners expect. Standard two-part epoxy systems generally list a minimum substrate temperature around 50°F, with performance dropping off sharply below it. Below that threshold, cross-linking slows enough that the coating can stay soft for days instead of hours.
Here’s how the common categories break down:
- Standard epoxy systems: 60°F to 85°F ambient and substrate, with 70°F to 75°F considered the sweet spot for working time and finish quality.
- Fast-cure or rapid formulations: similar minimums but a shorter working window, meaning less time to broadcast flakes or tool the surface before it sets.
- Low-temperature epoxies: formulated to go down to roughly 35°F to 45°F, but they trade speed for cold tolerance and usually cost more per gallon.
- High-heat or hot-climate blends: engineered with slower catalysts so they don’t flash-cure at 90°F-plus slab temperatures.
Choosing among these is mostly a seasonal decision. A garage floor project scheduled for a Texas July calls for a different hardener than one scheduled for a January cold front, and picking the wrong one costs you either working time or full cure strength.
How Temperature Changes the Epoxy Curing Chemistry
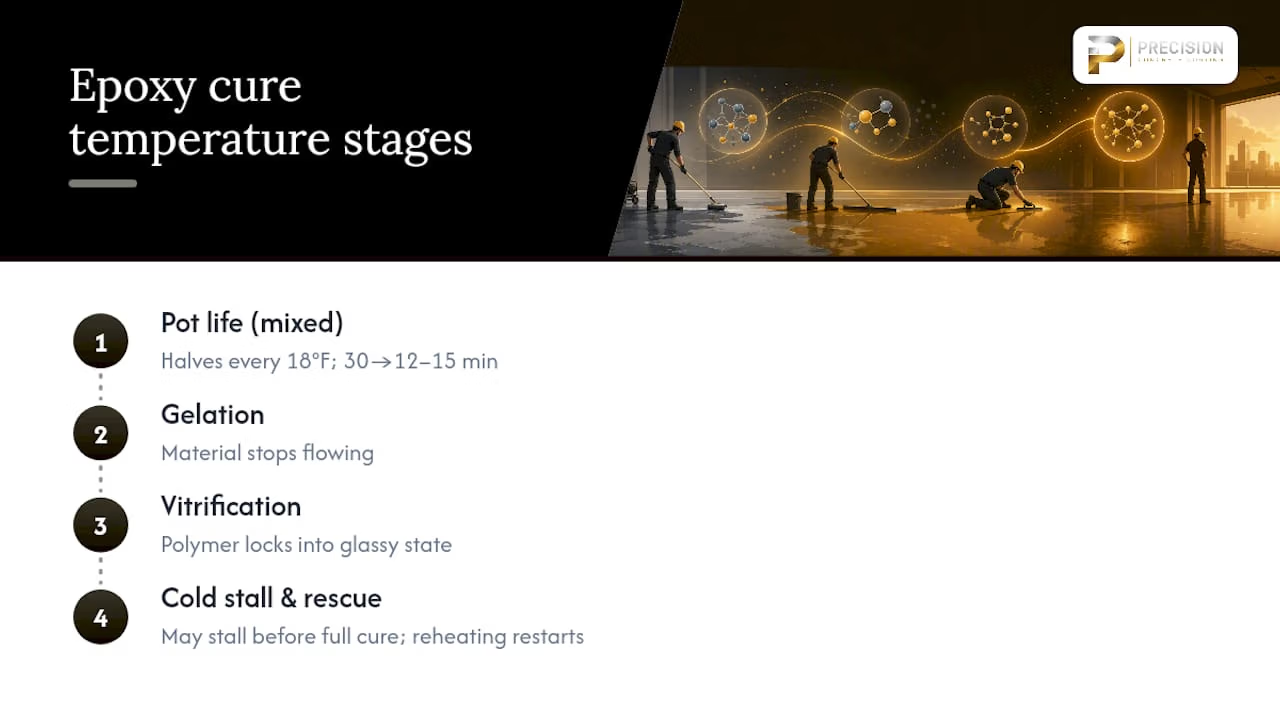
Epoxy cures through an exothermic chemical reaction between resin and hardener, and that reaction is temperature dependent in a very predictable way. As a rough field rule, pot life roughly cuts in half for every 18°F rise in temperature, which is why a bucket of mixed epoxy that gives you 30 minutes at 70°F might only give you 12 to 15 minutes at 90°F.
The reaction has to reach a point called gelation, where the material stops flowing, and eventually vitrification, where the polymer network locks into its final glassy state. If the slab is too cold, the mixture can stall before it ever reaches full cross-linking. Research into isothermal cure behavior confirms this directly: curing can halt entirely if vitrification sets in before the reaction completes, leaving a floor that looks dry but never reaches its rated hardness. The same study notes that reheating a stalled batch can restart the reaction, which is exactly why temporary heat sometimes rescues a cold-weather pour.
Get the temperature wrong in either direction and the symptoms show up fast: amine blush (a waxy film) in cold, damp conditions, soft spots that never fully harden, or bubbling and pinholing when heat drives air and moisture out of the slab too quickly during cure.
Substrate Temperature vs Air Temperature: The Dew Point Rule
Air temperature is the number everyone checks, but it’s the wrong number. Concrete has enormous thermal mass, and a slab in a garage often lags several degrees behind the surrounding air, especially early in the morning or after a cold night. Applying epoxy based on a thermostat reading instead of the floor’s actual temperature is one of the more common ways installations fail.
The rule that governs this is straightforward: keep the substrate at least 3°C, or roughly 5°F, above the dew point, and hold relative humidity below about 75% to 85% during application. Fall short of that margin and moisture can condense on or inside the surface as it cures, which is a leading cause of blistering and delamination in the first 24 to 48 hours after application.
Measuring this correctly takes three tools, not one:
- An infrared thermometer for a quick surface reading across multiple spots on the slab.
- A pin-style or surface probe thermometer for a more precise, contact-based reading.
- A hygrometer to track relative humidity and calculate the current dew point.
Top contractors log these readings hourly through the first day of cure rather than checking once before mixing.
Cold-Weather Epoxy Application: A Practical Checklist
Cold jobs fail for one of two reasons: the material was cold when mixed, or the slab kept losing heat faster than the coating could gain it. For a detailed approach on how to properly prepare your garage floor before application, consult this checklist urządzania podłogi w garażu. Both are avoidable with a bit of planning.
- Warm the components before mixing. Store resin and hardener at room temperature, ideally 65°F to 75°F, for at least 24 hours before use.
- Mix smaller batches. Cold slows the reaction, so smaller pours are easier to manage and tool before they start setting.
- Heat the space, not just the air near the floor. Use indirect or electric heaters and a temporary enclosure to bring the whole slab up to temperature evenly.
- Let the slab equilibrate. After heating, wait two to four hours for the concrete to stabilize before taking a final temperature reading and mixing.
- Monitor temperature through the full cure window, not just at application, and write the readings down.
Our guide on preparing a garage before coating covers the enclosure and drying steps in more detail.
Pro Tip: Never use an open-flame or unvented propane heater inside a closed garage during cure. Combustion byproducts can contaminate the surface and cause fisheye defects or adhesion failures that show up weeks later.
Hot-Weather Epoxy Application: Managing the Fast Cure
Heat is the opposite problem, and in a Texas summer, it’s the more common one. High slab and ambient temperatures accelerate the resin/hardener reaction, and pot life shortens enough that leveling and broadcasting flakes becomes a race against the clock. Skip the adjustments and you’ll see lap lines, poor self-leveling, and a rougher final texture.
A few adjustments make a real difference:
- Mix and pour in small batches so each one gets tooled before it starts to gel.
- Store unmixed components in a cool, shaded area, not in a hot truck bed or direct sun.
- Schedule application for early morning or evening when the slab temperature is at its lowest point of the day.
- Ask your supplier about a manufacturer-approved retarder or a slower hardener formulation for jobs above roughly 85°F.
Choosing between epoxy and a polyaspartic topcoat often comes down to exactly this kind of temperature sensitivity, since polyaspartics behave differently across the same heat range.
How Long Epoxy Takes to Cure at Different Temperatures
Cure time is not one number. It’s a curve, and temperature sets the slope. At a 70°F baseline, most standard epoxy systems are walkable in 12 to 24 hours and ready for light service in 3 days, with full chemical cure around 7 days.
Drop to 50°F and that timeline can stretch dramatically. Field observation shows roughly a doubling of cure time for every 18°F drop below 70°F, which can push full cure past two weeks. Push into the high 80s or 90s and the same floor can be walkable in half the time, though at some cost to leveling quality.

Checking readiness in the field is simple: press a fingernail or a rag with mineral spirits against an inconspicuous spot. If it marks or drags, it isn’t ready. But surface dryness isn’t the same as full cure. Coatings can feel dry to the touch while still soft underneath, which is why manufacturers rely on differential scanning calorimetry (DSC) in the lab to confirm true cross-link density rather than trusting a touch test alone. Our page on how long concrete should cure before coating breaks down timing further, and our guide on when it’s safe to park on a new coating covers the load-bearing side of that same question.
What a Professional Checks Before Coating a Garage Floor
A trained installer runs through a short list of checks before a drop of epoxy hits the floor, and most of it happens with tools most homeowners don’t own.
- Moisture testing per ASTM F2170, the standard relative humidity probe test for concrete slabs.
- Multiple slab temperature readings across the garage, not just one spot near the door.
- Dew point confirmation using a hygrometer, cross-checked against the substrate reading.
- A judgment call on whether the project needs a heated enclosure or a delayed start date.
Some situations genuinely call for a professional rather than a weekend project. Uneven slab temperatures across a large garage, elevated in-slab moisture readings, or a hard deadline (a sale closing, a holiday gathering) all raise the cost of getting it wrong. Some professional installers build moisture mitigation and heated-install capability into their process for exactly these conditions, sometimes backed by a long-term residential warranty on the finished coating.
Why Most Epoxy Failures Trace Back to One Missed Reading
The mistake I see referenced most often in installer write-ups isn’t a bad product or a rushed cure schedule. It’s skipping the slab temperature check because the air felt fine. A garage can read 68°F on a wall thermostat while the concrete near an exterior door sits five degrees colder, and that gap is exactly where dew point problems start.
Measure before you mix, not after something looks wrong. A five-minute check with an infrared thermometer and a hygrometer catches almost every condition that turns into a callback. Monitoring through the cure window, not just at pour time, is the habit that separates a floor that lasts fifteen years from one that needs to be redone in two.
— William
Get a Temperature-Checked Garage Floor Assessment
A DIY kit from a hardware store can’t tell you your slab’s dew point margin, and it definitely can’t heat an enclosure or run an ASTM F2170 moisture test before application. Some installers bring equipment and processes that homeowners doing it themselves usually skip: a site assessment, in-slab moisture testing, and heated-install capability for the handful of weeks each year when weather sits outside the ideal window.

That combination is why some companies back finished floors with a long-term residential warranty rather than a shorter guarantee that assumes ideal conditions every time. If you’re planning a coating project and aren’t sure whether your garage’s temperature and moisture levels are in range, request a garage floor assessment and estimate before you commit to a date. For a closer look at how the process plays out on an actual job, the Granger Pines case study walks through the temperature-control steps used on a recent Conroe installation.
Sources
- How temperature affects the curing process of epoxy flooring — Induspray
- Kinetic modelling and vitrification effects in epoxy curing (PMC)
- Temperature, dew point and environmental conditions in resinous flooring installations — Applied Floors
- Epoxy resins for flooring — how temperature, humidity and substrate prep affect installations — HG Iron (2026)
FAQ
How Hot Is Too Hot for Epoxy Application?
Most standard epoxy systems start losing working time and leveling quality above about 85°F to 90°F, since heat speeds the resin/hardener reaction and shortens pot life. Above that range, plan for smaller batches, shaded storage, and application during the coolest part of the day.
Can You Apply Epoxy in Cold Weather?
Yes, but only with adjustments. Standard formulations need a substrate temperature of at least 50°F to cure properly, while specialized low-temperature epoxies can go down to roughly 35°F to 45°F, usually paired with active slab heating and a longer cure window.
Will Epoxy Cure at 50 Degrees Fahrenheit?
Most standard epoxies will cure at 50°F, but slowly, and it’s right at the edge of many manufacturers’ minimum recommendation. Cure time at that temperature can run roughly double what it would take at 70°F, so plan for extended dry time before foot traffic or parking.
Will Tacky Epoxy Eventually Cure?
Sometimes, but not always. If the tackiness comes from a cold slab, reheating the area can restart the reaction because vitrification that stalls curing can reverse with added heat. If it comes from a bad mix ratio or contamination on the surface, no amount of added heat will fix it, and the coating needs to be removed and reapplied.
What’s the Ideal Dew Point Margin for Epoxy Application?
Keep the substrate at least 3°C, or roughly 5°F, above the current dew point, and hold relative humidity under about 75% to 85% during application. Falling below that margin raises the risk of condensation forming on the curing coating, which leads to blistering or poor adhesion.
2 Responses